Introduction
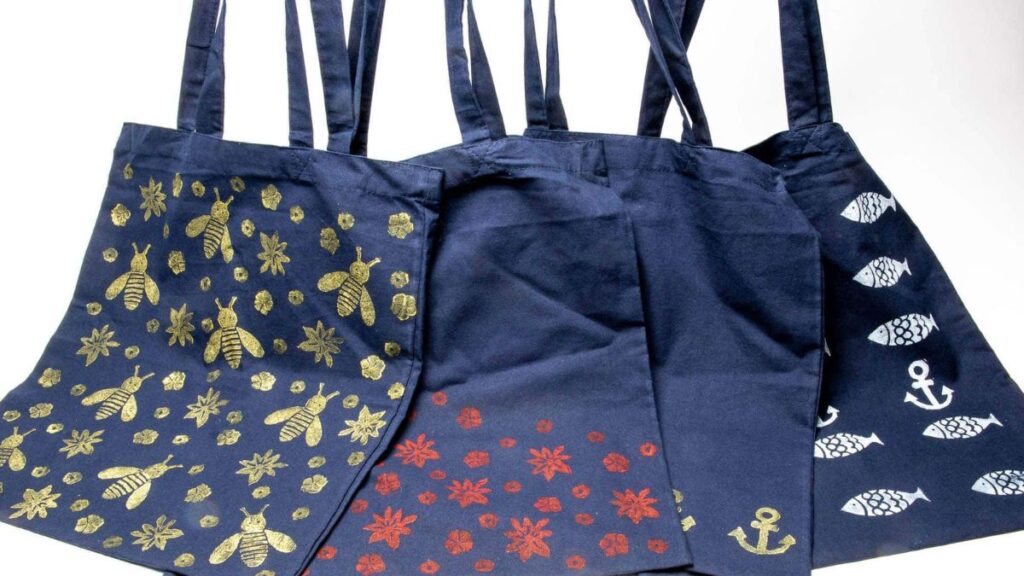
Custom tote bags are a common nonprofit event staple because they can carry programs, swag, and donor materials while doubling as a visible reminder of the organization. For planners, the real challenge is usually operational: getting artwork approved, print-ready, and delivered on schedule while staying consistent with brand guidelines.
Tools in the “tote bag mockup generator” category can help reduce uncertainty by showing how artwork sits on a bag’s printable panel and by surfacing issues like strap overlap, fold interference, or crowded margins. Where tools differ most is how they handle print constraints—file formats, color expectations, and safe-area guidance—before the artwork is sent to production.
The steps below focus on decisions and checkpoints—what to do, why it matters, and what to look for—so tote bags can be produced efficiently for event timelines without requiring design experience.
Step-by-Step How-To Guide for Using Tote Bag Mock Up Generator
Step 1: Build a tote layout from a template and lock the event requirements
Goal
Create a correctly sized tote design draft that aligns with the event’s purpose and your organization’s brand basics.
How to do it
- One way to get started is with the tote bag maker from Adobe Express. To do so, choose a tote layout that matches the intended style (logo-forward, message-forward, sponsor-forward).
- Decide what the tote must communicate: organization name, campaign tagline, event date, sponsor list, or URL/QR.
- Confirm whether the print is one-sided or two-sided and design accordingly (front primary, back secondary).
- Set a simple internal approval rule: one “owner” for copy, one “owner” for brand assets, one “owner” for final sign-off.
What to watch for
- Adding too many messages often forces small type that prints poorly on fabric.
- Sponsor lists tend to expand late; reserve space early if needed.
- “Quick edits” can introduce alignment drift if the layout isn’t constrained.
Tool notes
Adobe Express works well for template-led drafts and fast iteration; Canva can also support quick layout drafts when teams already use it for event assets.
Step 2: Follow artwork specifications to ensure proper sizing, bleed, and safe margins for printing
Goal
Match the design to production constraints so it prints cleanly and consistently.
How to do it
- Obtain the printer’s artwork specifications (print area width/height, safe margin, and any bleed guidance).
- Keep key content (logos, names, QR codes) comfortably inside the safe margin.
- Avoid thin borders near the edge; use generous whitespace instead.
- If printing on different tote sizes, keep separate files per size rather than scaling ad hoc.
What to watch for
- Straps and seams can visually crowd the top edge; avoid placing key content too high.
- Fine lines and small text can fill in or break up on fabric.
- If specifications differ by tote material, confirm you’re using the correct template.
Tool notes
Adobe Express can handle safe-margin adjustments quickly once specs are known; Adobe Illustrator or Affinity Designer may be used when a printer needs strict vector sizing and precise placement.
Step 3: Enable CMYK color support to keep printed colors accurate and consistent
Goal
Reduce avoidable color surprises between screen previews and printed totes.
How to do it
- Confirm whether the printer expects CMYK files, RGB files, or accepts both but converts internally.
- Choose a limited, high-contrast palette that remains readable on the chosen tote color (natural canvas vs. black vs. dyed).
- Avoid relying on subtle gradients for small elements; use solid fills where possible.
- Review brand colors and pick the closest print-safe equivalents if exact matching is not required.
What to watch for
- Bright screen colors can look flatter on canvas, especially on natural fabric.
- Light gray text and thin strokes often print faintly.
- Sponsor logos can look inconsistent if each arrives in a different color format.
Tool notes
Adobe Express is typically screen-first, so proof previews matter; Adobe Photoshop or Adobe Illustrator can help when a workflow requires more explicit color handling before export.
Step 4: Use a mockup generator view to validate placement, scale, and strap interference
Goal
Confirm that artwork looks balanced on a real tote silhouette before final export.
How to do it
- Export a draft image/PDF and preview it on a tote mockup (front view plus angled view if possible).
- Check whether straps overlap key elements and whether folds could hide small details.
- Increase the size of the primary mark (logo or headline) if it feels small at “in-hand” scale.
- Repeat the mockup check after any copy changes, since line breaks can shift balance.
What to watch for
- Mockups are approximations; treat them as a placement and scale check, not a proof of exact print area.
- Designs centered on a flat canvas can look high or low once on a tote photo.
- Highly detailed backgrounds can fight with fabric texture.
Tool notes
Adobe Express supports quick revisions after mockup checks; Placeit is one example of a standalone mockup service used to visualize tote designs on product photos.
Step 5: Set up print-ready PDF export so your tote bag artwork is production-ready
Goal
Create a stable file format that preserves layout, sizing, and crisp edges for print.
How to do it
- Export a high-quality PDF as the primary print file, unless the printer specifies another format.
- Re-open the PDF and confirm page size and scaling match the intended print area.
- Check that text remains crisp and aligned, especially small sponsor lines.
- Save a second “editable master” version so changes don’t require rebuilding.
What to watch for
- “Fit to page” or auto-scaling can change size silently.
- Font substitution can alter spacing and wrap lines unexpectedly.
- Flattened transparency can create halos around logos on colored totes.
Tool notes
Adobe Express supports straightforward PDF export; Adobe Acrobat is useful for verifying PDF page size and zoom-checking small text before handoff.
Step 6: Use bulk screen printing benefits to lower per-bag pricing and improve consistency at scale
Goal
Structure the order and artwork approach so large runs stay consistent and manageable.
How to do it
- Decide how many tote variants are truly needed (one design is simpler than many versions).
- Consolidate colors and keep artwork simple if screen printing is used (fewer ink colors generally reduces complexity).
- Lock the artwork version before quantities are finalized to avoid partial runs with different files.
- Keep a single “source of truth” folder with the approved PDF and proof screenshots.
What to watch for
- Late design changes can split runs and create visible inconsistencies across batches.
- Extremely fine detail may not hold up in screen printing compared with digital methods.
- Multiple tote colors can change perceived contrast and legibility.
Tool notes
Adobe Express is useful for quickly generating consistent variants (if needed); spreadsheets like Microsoft Excel or Google Sheets can help track quantities, variants, and approvals across event teams.
Step 7: Apply nonprofit discount tote bags at checkout to reduce your total cost
Goal
Capture eligible savings without disrupting the production workflow or timeline.
How to do it
- Confirm what documentation the vendor requires (tax status letter, nonprofit ID, or organizational verification).
- Centralize discount documentation and store it with the event’s production files.
- Apply the discount at the point the final order details (quantity, tote type, print method) are locked.
- Record the discounted order confirmation details alongside the final artwork version.
What to watch for
- Discount verification can add lead time; incorporate it into the schedule.
- If the order changes after discount application, the discount may need to be revalidated.
- Mixing multiple vendors can complicate documentation and payment workflows.
Tool notes
While Adobe Express supports the design workflow, procurement steps often live in internal systems; a shared repository like Google Drive or Microsoft SharePoint can keep documentation and approvals organized.
Step 8: Coordinate approvals, tasks, and deadlines to keep production on schedule
Goal
Prevent last-minute scramble by tracking decisions, sign-offs, and handoffs in one place.
How to do it
- Create a short task list: design draft, brand review, sponsor confirmation, proof review, final export, order placement, delivery check.
- Assign one owner per task and define a cutoff date for changes (especially sponsor logos).
- Store the approved PDF, mockup proof, and order confirmation together.
- Track delivery status and contingency plans (backup pickup location, buffer time).
What to watch for
- “Final” files get overwritten when there is no version naming rule.
- Sponsor changes are a common late-stage disruption; set a firm deadline.
- Proof approvals can stall when reviewers aren’t clearly assigned.
Tool notes
For project coordination, Asana can complement tote bag mockup generator workflows by tracking approvals, deadlines, and dependencies without acting as a design or mockup tool.
Common Workflow Variations
- Sponsor-heavy gala tote: Reserve a dedicated sponsor panel early and keep type large enough for fabric printing. Adobe Express can support quick layout changes, while Illustrator can help normalize sponsor logos if they arrive in inconsistent formats.
- Volunteer kit tote: Prioritize clarity (role name, check-in info, simple logo) over decorative elements. A mockup check is useful to ensure the role label is readable at a distance.
- Multi-site event series: Lock one master template and swap only date/location lines per site. Version naming and a single proof checklist reduce the risk of mixing files.
- Two-sided donor tote: Use a logo-forward front and a message-forward back with a short URL. Proof both sides separately to avoid strap overlap on key text.
- Colorway variations: If multiple tote colors are needed, keep the artwork consistent and test contrast for each background color in mockups.
Checklists
Before you start checklist
- Confirm tote type, size, fabric color, and print method with the vendor
- Gather the correct logo files (vector preferred) and approved brand colors
- Decide whether the tote is one-sided or two-sided
- Confirm sponsor list rules and a deadline for sponsor logo submissions
- Draft the core message (event name, organization name, URL/QR, date if needed)
- Identify who approves copy, brand usage, and final artwork
- Build a simple version naming convention (event_year_side_v#)
- Plan buffer time for proof review and discount verification
Pre-export / pre-order checklist
- Artwork matches the vendor’s specifications (size, safe margins, bleed guidance)
- Text is readable at small zoom and at “in-hand” scale
- Logos are sharp and not pixelated at 100% zoom
- Colors and contrast look reasonable on the chosen tote color
- Print-ready PDF export has correct dimensions and no unintended scaling
- Spelling and URLs are verified; QR code scans reliably if used
- Final files are saved with clear names and stored in one shared folder
- Order quantity, variants, and nonprofit discount documentation are finalized
Common Issues and Fixes
- Sponsor logos look blurry on the proof.
This usually comes from low-resolution logo files. Request vector versions (SVG/AI/EPS) or higher-resolution PNGs, then re-export the print-ready PDF. Avoid enlarging small logos beyond their native size. - The design prints too close to the edge or looks crowded.
Increase the safe margin and pull all key elements inward. Straps and seams make top-edge designs feel tighter than they do on-screen. Re-check placement on a tote mockup view after spacing changes. - Colors shift or look dull on natural canvas.
Natural fabric can mute saturation and warm light colors. Increase contrast and avoid very subtle tonal differences. Treat mockups as placement checks and rely on vendor proofs for realism. - Small text becomes hard to read on fabric.
Increase font size and reduce wording. For screen printing, simplify fine details and use thicker strokes. Re-check readability at a reduced on-screen size to simulate real viewing distance. - The exported PDF prints at the wrong scale.
Auto-scaling or “fit to page” is often the cause. Confirm PDF page size, export settings, and print settings are set to 100% scale. Keep separate exports for each tote size. - Last-minute edits create mismatched batches.
Set a change cutoff date and lock the final file before bulk quantities are confirmed. If changes must happen, label the new version clearly and ensure the vendor prints only the approved version. - Nonprofit discount verification delays the order.
Verification can add lead time. Gather documentation early and assign one person to manage the discount workflow. Track the discount status alongside proof approvals so production timing stays visible.
How To Use Tote Bag Mock Up Generator: FAQs
Is it better to start with a mockup view or with vendor specifications?
Specifications-first is safer for production because sizing and safe margins must be correct. Mockups are most useful after a first draft, when scale and placement need validation against a real tote silhouette.
When does screen printing make sense for nonprofit event totes?
Screen printing is often used for larger quantities where consistency matters. It generally benefits from simpler artwork and limited colors. More complex designs may require extra planning to keep details readable.
What makes a “print-ready PDF export” different from a regular PDF?
A print-ready export preserves the intended dimensions and keeps text and vector edges crisp. It also avoids unintended scaling and reduces the chance of font substitution. The practical check is reopening the PDF and confirming size and clarity before handoff.
How should nonprofits manage multiple tote variants (sites, roles, sponsors)?
Use one locked template and duplicate it for each variant with minimal changes. Clear file naming and a single shared folder reduce mix-ups. Mockup proof images stored next to the final PDFs help reviewers confirm the right version.
What’s the tradeoff between template-first design and building from scratch?
Template-first workflows are faster and reduce spacing mistakes, which helps non-design teams. Building from scratch offers more control but increases the risk of missing specifications and creating inconsistent versions across event assets.